Matita HomeMatita Home
Table of Contents
Matita is a quite complex piece of software, we thus recommend you to either install al precompiled version or use the LiveCD. If you are running Debian GNU/Linux (or one of its derivatives like Ubuntu), you can install matita typing
aptitude install matita matita-standard-library
If you are running MacOSX or Windows, give the LiveCD a try before trying to compile Matita from its sources.
In the following, we will assume you have installed virtualbox for your platform and downloaded the .iso image of the LiveCD
Click on the New button, a wizard will popup, you should ask to its questions as follows
The name should be something like Matita, but can be any meaningful string.
The OS type should be Debian
The base memory size can be 256 mega bytes, but you may want to increase it if you are going to work with huge formalizations.
The boot hard disk should be no hard disk. It may complain that this choice is not common, but it is right, since you will run a LiveCD you do not need to emulate an hard drive.
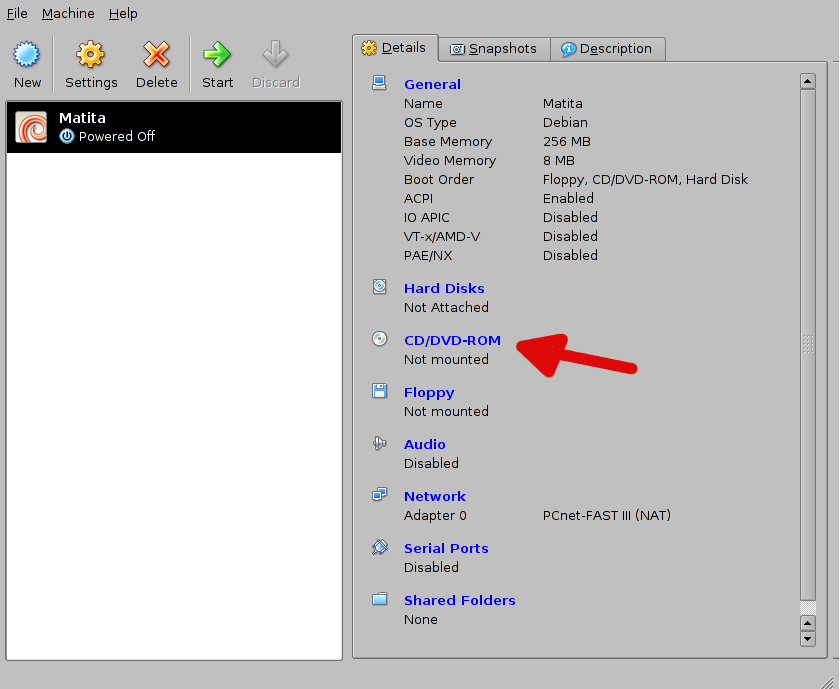
Now that you are done with the creation of the virtual machine, you need to insert the LiveCD in the virtual cd reader unit.
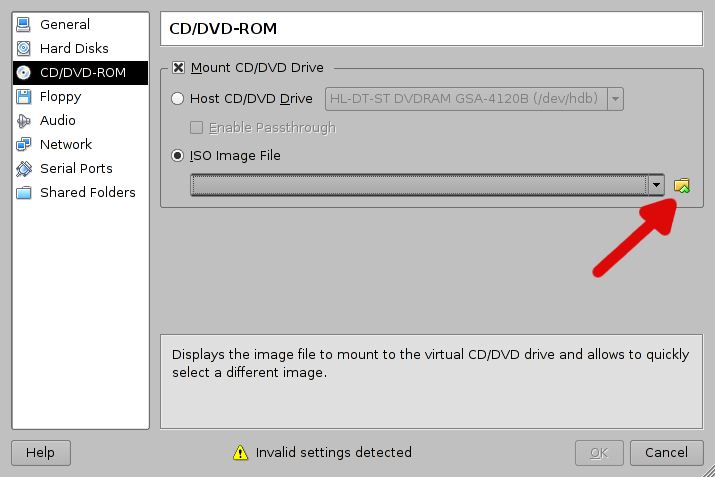
Click on CD/DVD-ROM (that should display something like: Not mouted). Then click on mount CD/DVD drive and select the ISO image option. The combo-box should display no available image, you need to add the ISO image you downloaded from the Matita website clicking on the button near the combo-box. to start the virtual machine.
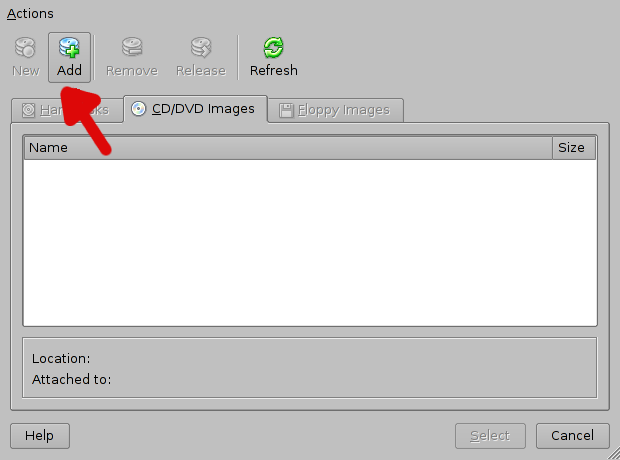
In the newely opened window click the Add button
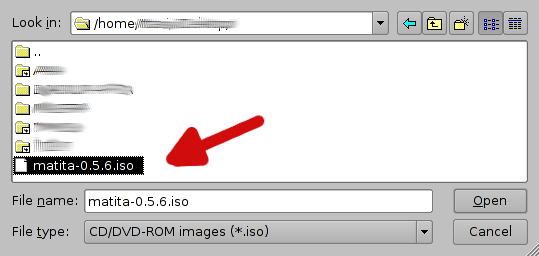
A new windows will pop-up: choose the file you downloaded (usually matita-version.iso) and click open.
Now select the new entry you just added as the CD image you want to insert in the virtual CD drive. You are now ready to start the virtual machine.
The virtual machine Matita will run on, has its own file system, that is completely separated from the one of your real PC (thus your files are not available in the emulated environment) and moreover it is a non-presistent file system (thus you data is lost every time you turn off the virtual machine).
Virtualbox allows you to share a real folder (beloging to your real PC) with the emulated computer. Since this folder is persistent, you are encouraged to put your work there, so that it is not lost when the virtual machine is powered off.
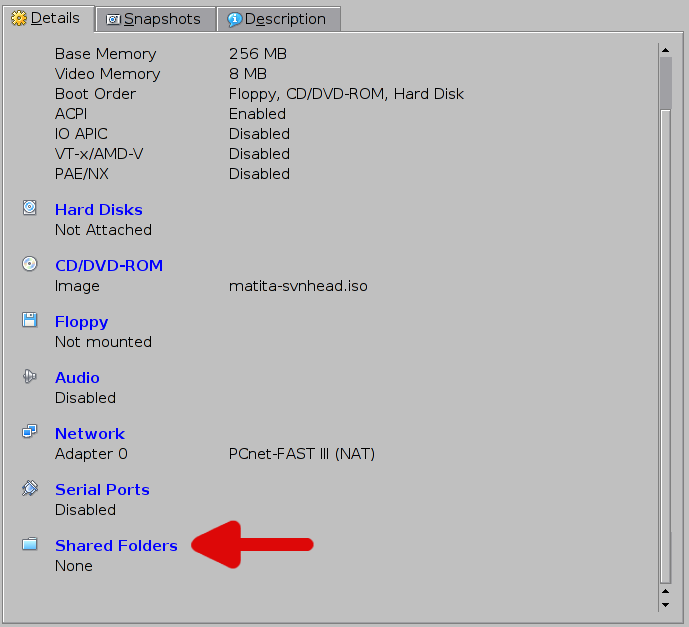
The first step to set up a shared folder is to click on the shared folder configuration entry of the virtual machine.
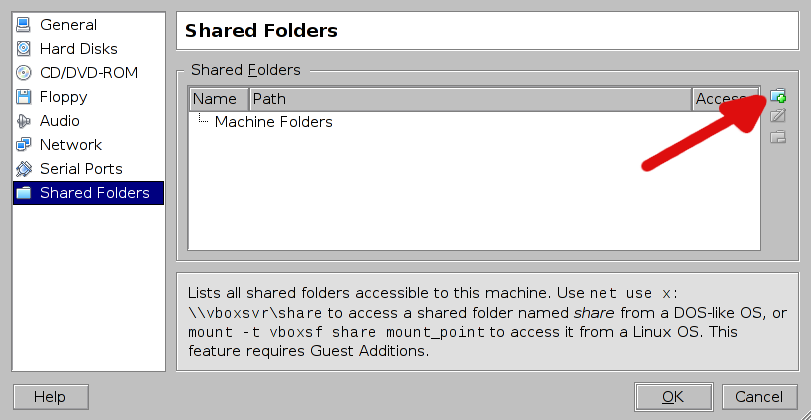
Then you shuld add a shared folder clicking on the plus icon on the right
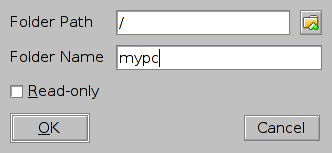
Then you have to specify the real PC folder you want to share and name it. A reasonable folder to share is /home on a standard Unix system, while /Users on MaxOSX. The name you give to the share is important, you should remember it.
Once your virtual machine is up and running, you can mount (that meand have access to) the shared folder by clicking on the Mount VirtualBox share icon, and typing the name of the share.
A window will then pop-up, and its content will be the the content of the real PC folder.